A wooden ladder leaning against a living room wall has a way of making a room feel settled. It suggests quiet evenings, a good book, and a throw within reach. That is why so many people are drawn to a DIY wooden ladder blanket rack: it stores the blankets you actually use while adding warmth, height, and texture to a space that might otherwise feel flat.
The best part is that you do not need a workshop full of tools or a big budget. A few boards, some dowels, and an afternoon can give you a piece that looks intentional and fits your style. Whether your living room leans farmhouse, boho, industrial, coastal, or modern, there is a ladder idea here that will blend in and still feel personal.
Below are 10 DIY wooden ladder blanket rack ideas for living rooms, each with practical details on materials, time, difficulty, and styling. Pick the one that matches your tools, your space, and the way you live. Then make it yours with paint, stain, rope, or whatever finish fits the room.
Quick answer: The most reliable DIY wooden ladder blanket rack is a leaning ladder made from two 2×3 boards cut to about 6 feet, with five rungs spaced 12–14 inches apart. Sand, stain or paint, then screw or dowel the rungs into place. Add rubber pads at the base. It costs roughly $20–$40, takes an afternoon, and works in farmhouse, boho, industrial, or modern living rooms.
1. Classic A-Frame Ladder with Weathered Oak Finish
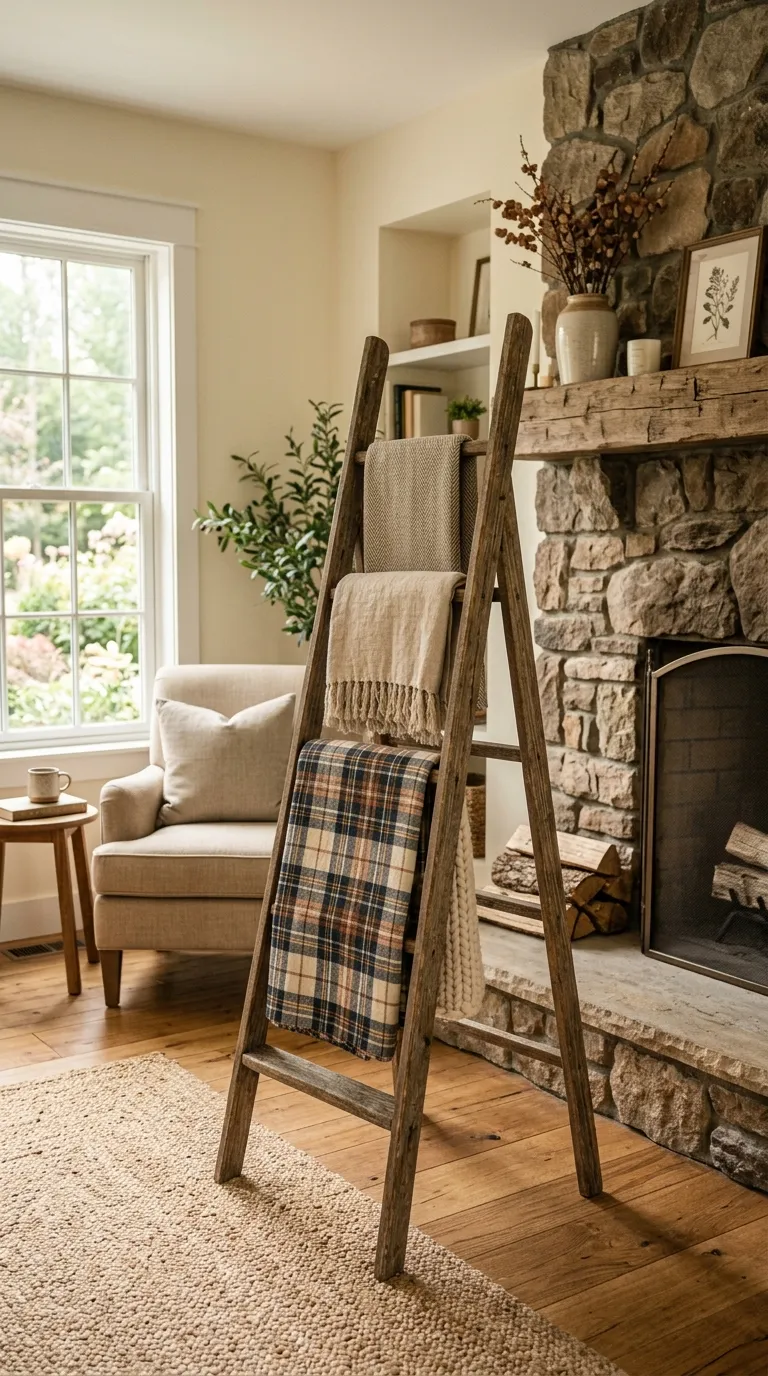
The leaning ladder is the blueprint most people picture when they think of a blanket rack. It works because it is open and airy, letting throws become part of the room’s texture instead of being hidden away in a basket. A weathered oak finish keeps it neutral enough for almost any living room.
Materials:
- Two 2×3 boards, 8 feet long
- Five 1-inch dowels or 1×2 boards cut to 18 inches
- Wood glue, 2½-inch wood screws, 1¼-inch screws
- Sandpaper in 120 and 220 grit, plus a tack cloth
- Weathered oak stain and water-based polyurethane
- Rubber or felt pads for the feet
How to make it:
- Cut the rails to 6 feet and the rungs to 18 inches.
- Mark rung positions every 12 inches, starting about 10 inches from the bottom.
- Pre-drill pilot holes to prevent splitting. Apply glue, then screw the rungs into place from the outside of the rails.
- Sand all edges until they feel smooth. Wipe away dust, stain, let dry, and seal with two coats of polyurethane.
- Attach pads to the bottom of each rail so the ladder grips the floor without scratching it.
Time: 2–3 hours plus drying time. Difficulty: Beginner-friendly with basic tools.
Customize the width for chunky quilts or keep it narrow for lighter throws. A 6-foot height suits most living room walls, but a 5-foot version works near a low sofa. Lean it beside a fireplace, a reading chair, or a console table. For a budget alternative, use pallet wood or leftover lumber and skip the stain in favor of a clear matte sealer.
💡 Pro Tip: Clamp the rails together before drilling so the rung holes line up perfectly on both sides.