A toy box is one of those pieces of furniture that quietly earns its keep. It swallows the blocks, the stuffed animals, the dress-up clothes and the mystery pieces of plastic that appear from nowhere, and it gives a child a place that belongs to them. Building one yourself means you get to decide the size, the colour, the height of the lid, and whether it rolls, stacks, or doubles as a reading bench. That is a lot of control for a Saturday afternoon of work.
These 10 DIY wooden toy box ideas for kids rooms range from a beginner-friendly crate build to a fold-down play table that hides everything underneath. Some use a single sheet of plywood, others repurpose a dresser drawer or a stack of pallet boards. All of them are designed around the way children actually use a room — climbing, dragging, hiding, and dumping everything on the floor at 7 a.m.
You do not need a full workshop. A drill, a saw, sandpaper, wood glue, and a bit of patience will carry you through most of these projects. What matters more is thinking about safety, height, and how the lid behaves when a curious four-year-old leans on it. I have flagged those details in each build so you can plan around them instead of discovering them later.
Quick answer: The best DIY wooden toy boxes are built from pine, plywood, cedar, or reclaimed pallet wood, sized roughly 30–36 inches long and 16–18 inches tall so a child can reach the bottom, and fitted with soft-close lid supports or a completely removable lid. Choose a rolling box for small rooms, a cubby style for books and toys together, or a bench design that doubles as seating. Finish with child-safe paint or water-based polycrylic and round every edge.
1. Classic Cedar Toy Chest with Soft-Close Lid Supports
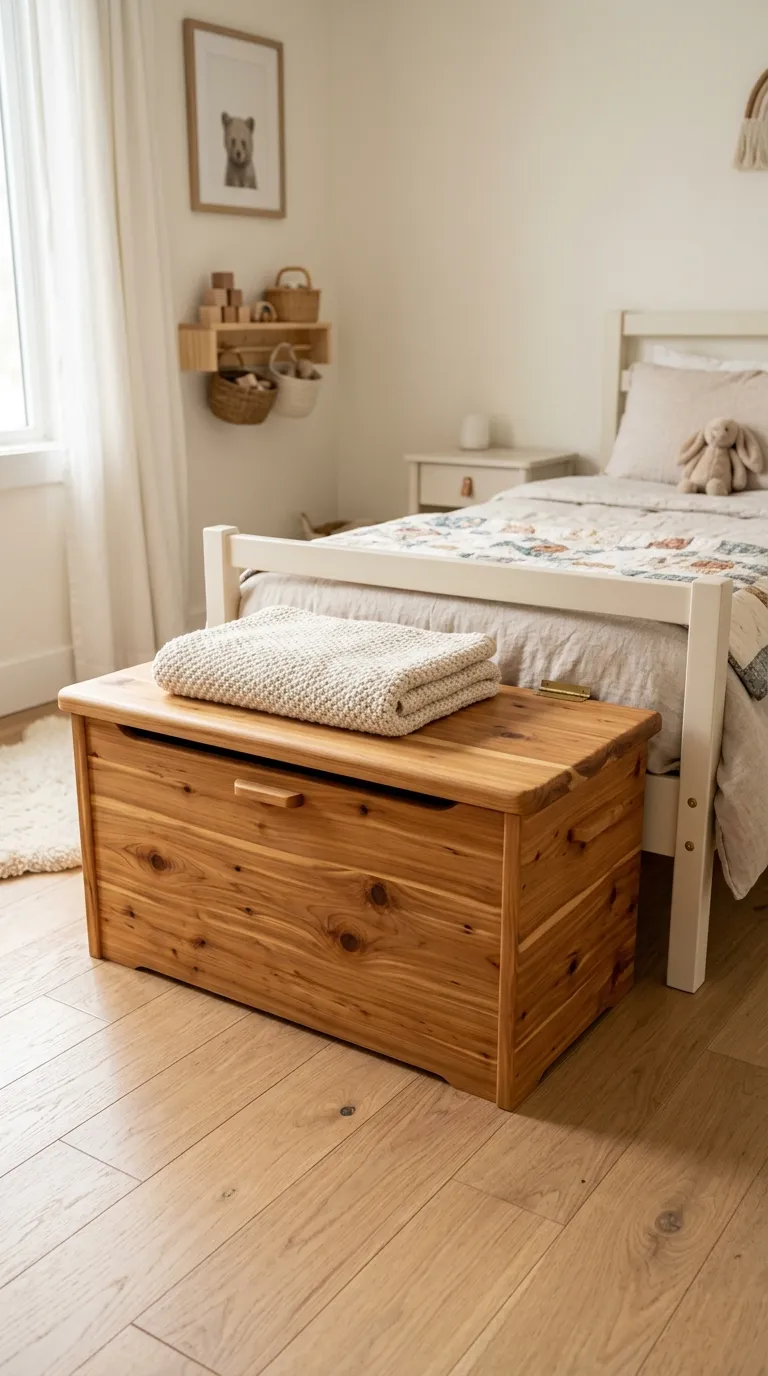
This is the design most people picture when they imagine a wooden toy box: a deep rectangular chest with a hinged lid, a slightly overhanging top, and enough weight that it stays put when a toddler leans on it. Cedar or pine 1×12 boards keep the build manageable because you are working with a single depth of lumber for the sides, front, and back.
Materials:
- Four 1×12 boards, cut to length for two sides, front, and back
- One piece of 3/4-inch plywood for the base
- Wood glue and 1-5/8-inch exterior screws
- Soft-close toy box hinges (the damped kind made specifically for chests)
- 120- and 220-grit sandpaper
- Water-based polycrylic, milk paint, or a child-safe chalk paint
- Felt pads or a strip of weatherstripping for the lid edge
Time: one weekend, including finish drying time. Difficulty: intermediate.
Cut the two side panels first, then the front and back to match. Pre-drill every screw hole — cedar splits if you skip this step. Glue and screw the box together, check for square by measuring diagonally corner to corner, then attach the plywood base from underneath. Round the top edges of the lid with sandpaper before you install anything, because it is far harder to reach once the hinges are on.
The hinge choice is the part worth spending money on. Standard butt hinges let a lid slam, and a heavy lid slamming on small fingers is the reason toy box safety standards exist in the first place. Damped toy box hinges hold the lid at any angle and lower it slowly. If you would rather skip hardware entirely, make the lid a lift-off panel instead and add a small rope handle on each end.
For customization, stain the cedar a warm honey tone and leave it natural, or paint the body a soft sage and keep the lid bare wood. A chest like this looks at home at the foot of a bed, under a window, or pushed against a wall with a cushion on top.
💡 Pro Tip: Cut a shallow finger relief notch into the front edge of the lid, or leave a two-inch gap between the lid and the box front. Children should never have to lift a heavy lid with flat fingers.